Grab your coffee, get ready to meet in person or video chat, whatever is convenient for you, and let’s get to know each other.
Once you reach out, a member of our team will:
• Ask about your energy goals and what’s motivating your interest in solar • Use your address and a recent electric bill to create a preliminary design and energy model • Consider your roof size, shading, pitch, orientation, and usage to estimate potential savings
If your home looks like a good fit for solar, we will schedule a site visit that works for you, either in person or virtual.
2
STEP 2
Home Site Evaluation
It’s pretty simple. We’ll take a closer look at your home to make sure everything is a good fit. This visit helps us gather the details we need and answer any questions along the way.
One of our solar designers will:
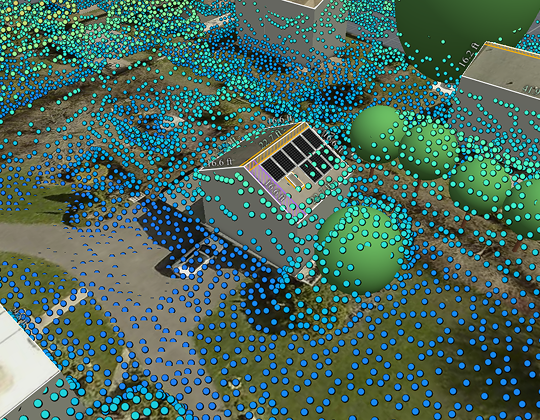
• Fly a drone at your home to capture detailed roof imagery
• Assess your electrical panel and systems
• Confirm the proposed system works for your home
If anything needs adjusting, we’ll walk you through solutions like adding energy storage or planning for future upgrades.
3
STEP 3
System Design
It’s pretty simple. We’ll take a closer look at your home to make sure everything is a good fit. This visit helps us gather the details we need and answer any questions along the way.
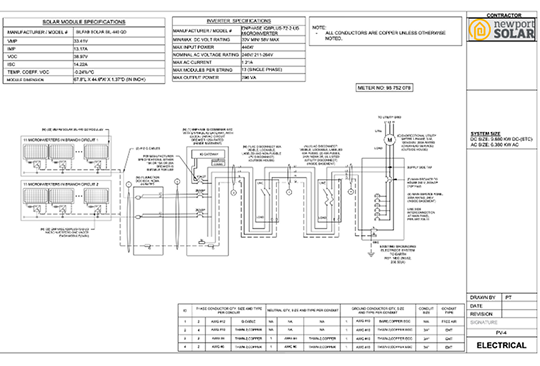
After your home evaluation, our design team will finalize your system layout and prepare a detailed proposal that includes:
• System size and panel layout • Estimated energy production and savings • Available tax credits and local incentives • Financing options if needed • Utility requirements and permitting timeline
Our systems are designed to perform. Every detail is tailored to your home and your energy goals.
4
STEP 4
Permitting and Preparation
Once you give us a “thumbs up” on the proposal, we take care of permitting, utility documents, and engineering reviews to finalize your system plans. Your project enters our install queue. As your window approaches, we’ll confirm your date and walk you through next steps.
To prepare:
• Clear the area around your electrical panel • Trim vegetation near your utility meter • Have your WiFi password ready
We stay in close contact to ensure everything is ready for install day.
5
STEP 5
Installation Day
This is the big day! You’re on your way to harnessing the power of the sun.
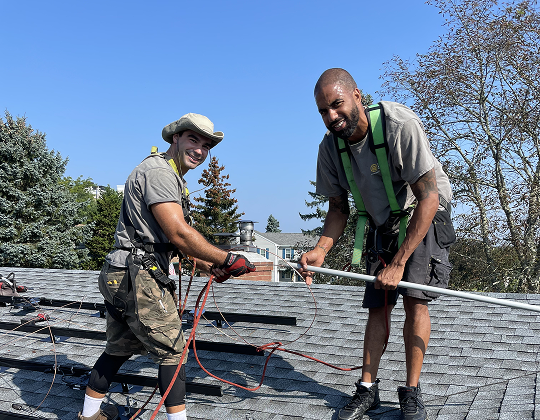
Installation typically takes one or more days, depending on system size and any upgrades. Our in-house crew works from 9 am to 4 pm. We ask that someone be home in the morning to meet the Crew Lead and review the plan. After that, you’re free to go about your day while we take care of the rest.
During installation, the crew will:
• Prep your roof for secure equipment placement • Install wiring, racking, and solar panels • Complete the final electrical tie-in
A brief power outage may be needed at the end. Your Crew Lead will let you know when it’s coming so you are never caught off guard.
6
STEP 6
System Activation and Support
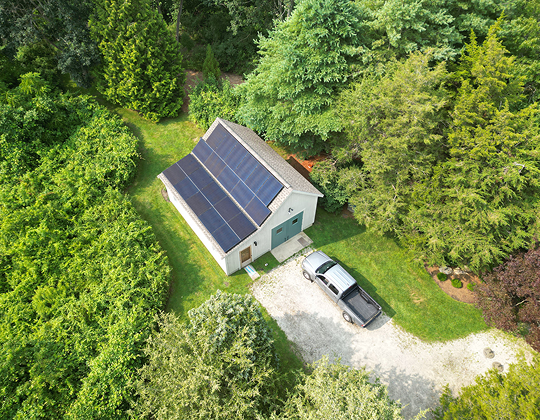
Your system is installed, your panels are in place, and everything looks great. Just a few final steps before your home runs on sunshine.
What happens after installation:
• Inspection: We schedule your town’s final inspection within 1 to 2 weeks • Approval: Rhode Island Energy typically issues approval within 10 business days • Activation: We turn on your system and share a simple monitoring guide
Your system includes long-term warranties and ongoing support. We’re always here if you need us.